How To Install Garage Door Openers (Guide & Videos)
This post contains affiliate links.
Garage door openers may come pre-installed in many houses. However, there may come a time when you need to replace them.
In this case, you must install a new garage door opener system. If you are into DIY, you may be interested to know how to install your own garage door opener system.
To install a new garage door opener system:
- Remove old systems (if needed)
- Assemble the railings
- Fasten the motor to the railings.
- Install the pulley system.
- Install the header bracket support.
- Hang the opener, and install the door bracket and arm.
- Add electronics and controls.
- Test the installation.
In this article, we explore how you can install your own garage door opening system. We also look at some common questions about garage doors.
How To Install Garage Door Openers?
Installing garage door openers involves several major steps. First, you remove the old systems. Then you will assemble the system before installing it on your garage door. It is possible to perform the job by yourself.
Installing a garage door opener system is not rocket science. You can do it with basic hand tools and safety equipment. However, when installing, ensure you have the safety procedures ready. Wear safety gear, and secure your garage door to prevent it from falling.
You also want to refer to the manufacturer’s instructions. This is because different makers may have slightly different installation steps.
The general steps to install a garage door opener system are as below:
- Take Inventory: Don’t ignore the assembly instructions. Sort all the parts before assembly. Read up on the instructions, and familiarize yourself with the procedure first.
- Assemble The Railing: Rails come in pieces that slot together. The assembly process usually includes the trolley that connects to the door.
- Connect With the Motor: Fasten the rail to the motor unit.
- Install Pulley System: Install the chain/belt on the track’s door end, including the idler pulley. Depending on the model, the chain/belt is slightly longer than the rail; it’s not continuous, like a bicycle chain. A cable completes the chain loop and passes over the idler pulley on its way back to the motor unit.
- Install The Header Bracket Support: This is a 2×4 or larger piece of lumber. It usually anchors to the framing above the door and supports the track’s door end.
- Hang The Opener: The motor unit mounts to the garage ceiling with two or more pieces of angle iron. The rail mounts to the header bracket support via the header bracket.
- Install The Door Bracket And Arm: The arm is the L-shaped metal bar that attaches the door to the trolley on the rail.
- Install The Controls: Add the electronics, including the door button and safety sensors. The wiring is low-voltage and can be mounted to the walls and ceiling of the garage. Or get an electrician if you are unsure what to do.
- Program The Opener: Depending on your model, you may need to program the opener for proper door travel. Check your user manual for more specific instructions.
- Test To Confirm: Now that everything is set up, check the system. Ensure all is in working order before wrapping it up.
How Long Does It Take To Install Garage Door Openers?
Generally, it should take about three to six hours to install garage door openers. The actual time may depend on things such as the complexity of the system and your DIY skills. You may need more time if you need customized work, such as wiring.
Installing a garage door opener is usually not a complicated job. In the hands of someone comfortable with DIY work, you should be able to get the job done in three to six hours.
However, the actual time may depend on several additional factors. These factors may shorten or lengthen your actual installation time:
Removals
Generally, older garage door opener systems are not compatible with newer systems. This means you probably will need to remove them before installing your new system.
Suppose you have to remove the rails, motors, and pulley system of older garage door openers. In this case, it will add additional time to the installation work.
Complexity
Suppose your garage has multiple doors. This means you will need multiple systems to open and close them. You may also have a large, heavy door requiring a more complicated system.
Installing these complicated garage door openers may add more time. Take notice of this, especially if you plan to hire out the work. You want to ensure the bill will remain within your installation budget.
Customized Work
If you need to perform customized work, this will add more time. Common customized work includes additional wiring or electrical work. More extreme customization may alter the rail, etc.
Similar to complexity, customized work may add up to your bill. This is especially if you are looking for professional help. Keep this in mind to avoid overblowing your budget.
Handyman Skills
Suppose you intend to install the door yourself. In this case, your handyman skills will largely determine how long it will take.
Let’s say you are comfortable holding screwdrivers and wrenches. You may not take much time to complete the work in this case. However, if you are not good with DIY work, installation may take more than six hours.
Tips When Installing Garage Door Openers
Some tips when installing garage door openers include:
- Ensure the door is balanced before installing the opener
- Leave the existing unit in place until you are ready to mount it.
- Set the motor unit on a tall ladder.
Ensuring The Door Is Balanced Before Installing
Make sure the door is balanced before installing the opener. A balanced door will hold itself and won’t close if you open it about halfway and let go.
A door out of balance is tough on the opener and dangerous. Have your door balanced by an expert if needed.
Leave Everything In Place Until Mounting
If you’re replacing an existing unit, leave it in place until you’re ready to mount the new opener. It will come in helpful as a visual reference for how everything fits together.
Set Motor Unit On A Tall Ladder
Set the motor unit on a tall ladder or get a buddy to help. When mounting the unit to the ceiling, check the motor is in the desired position. Then, measure the angle for iron supports.
FAQ
How To Operate The Garage Door Opener Manual Release?
A manual release disconnects the garage door opener from the door itself. This allows you to operate the doors manually. However, you still keep the spring, meaning you can still depend on them to help do the lifting work.

To operate the garage door opener manual release:
- Close The Garage Door: You are going to disconnect the motor. This means you want to ensure the door is fully closed. This avoids any potential accidents.
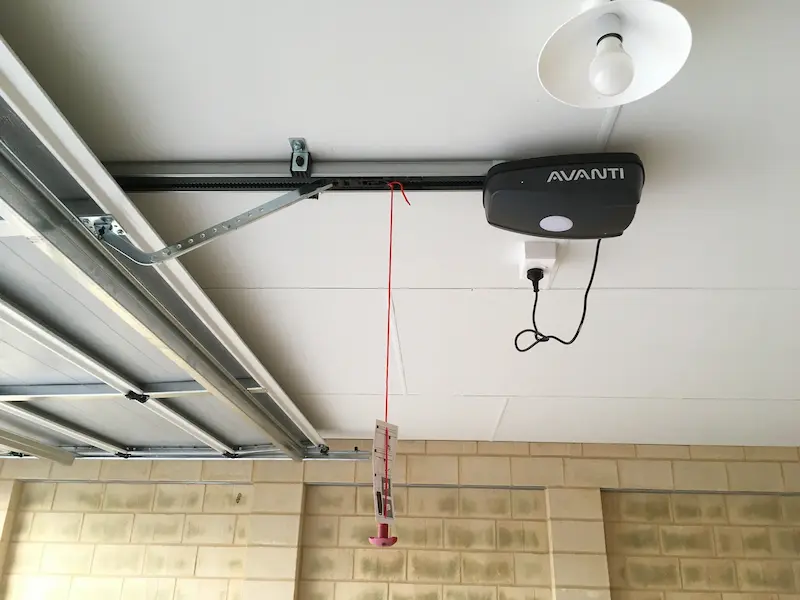
- Look For Release Handle Or Cord: They are usually red in color and hands from the motor unit.
- Pull The Handle Or Cord: Grip the cord or handle, then pull it downward. This action should disengage the door from the motor. You should not be able to manually open and close the door.
- Re-engage When Ready: Ready to re-engage the motor to the door? Simply reconnect the cord or handle back to the motor. This is usually done in the reverse of the disconnecting process.
Should I Upgrade an Old, But Working Garage Door Opener?
If you have been running an older garage door opener system, consider upgrading it. Older door openers are those manufactured before Jan. 1, 1993.
This is because you stand to benefit from many safety features.
First, modern openers generate electronic beams to prevent entrapment. When a person, animal, or object breaks the beam, it triggers the safety mechanism. The safety mechanism causes the closing door to reverse direction.
Garage door openers also have detection sensors. When the closing door contacts an obstacle, it stops operating. Follow the opener manufacturer’s instructions for testing the unit’s safety features.
Newer garage door openers can also improve security. Newer garage doors usually use rolling codes. These codes change at an interval to make it harder for hackers.
Newer garage door openers may also come with battery backup. This feature allows you to open and close the garage even if your home has no power.
How To Make My Garage Door Opener Quieter?
If you are looking to make your garage door opener quieter, consider one of the following options:
Skip Chain Drive Opener: The chain drive opener system is usually the noisiest. This is because chains naturally make a ton of noise. Check out if you can use a belt, direct, or jackshaft/wall-mounted opener instead.
Use Nylon Rollers: Rollers made of steel are hard and durable but make a lot of noise. Consider using nylon rollers instead. They may be slightly less durable than steel but much quieter.
Use Torsion Springs: If your garage door opener uses extension springs, replace it with torsion springs. They are quieter when operating and should make less noise.
Lubricate Metal Components: Suppose the noise from your garage opener system is more on the creaky side. In this case, lubrication may help. Consider applying some white lithium grease (paid link) to lubricate the moving metal parts. This should get you a quieter operation.
Read More: Different Types of Garage Door Openers
Read More: Different Types of Garage Doors


