How Garage Door Sensors Work (Troubleshooting & Fixes)
This post contains affiliate links.
Garage door openers work like magic – one press of the button, and the door slides up and down. The doors also seem to know when to stop when there is something in the way. Ever wonder how garage door sensors work?
Garage door sensors utilize two photoelectric sensors, one receiver, and one beamer. These sensors are usually installed low on both sides of the garage door. When the sensors cannot communicate, they assume that there is an obstruction. The garage door then stops.
This article explores how garage sensors work and how to know if your sensor is not working well. We also look into how you troubleshoot your garage door sensor problems and how to fix the sensors back.
What Do Garage Door Sensors Do?
Garage door sensors’ primary task is to detect any obstruction that may cause the door to not close well. By doing this, garage door sensors help prevent accidents and damage. Garage door sensors also ensure the doors close properly, reducing risks of break-ins.
Garage door sensors are an indispensable tool for a garage door. It helps ensure your door operates well, safely, and securely. Here are several major functions of a garage door sensor:
Detect Obstructions
The main function of a garage door sensor is to detect any obstructions. Obstructions could be an object, person, or anything blocking the way of the garage door as it closes. When the sensor detects an object, it stops operating.
This ability to sense and stop is achieved using a set of communicating sensors. When the sensors fail to communicate, it signals the motor to stop. This halts the door. Once you remove the obstruction, the door closes as normal again.
Prevent Mishaps
Garage door sensors detect obstructions and stop the doors. This means they also prevent mishaps from happening. This is achieved by preventing the door from closing on people or objects who cannot move away in time.
This may be important, as a garage door can be very heavy. The weight could crush someone or cause damages and injuries too.
Fulfilling Safety Requirements
In many jurisdictions, garage doors need to come with sensors. The sensors help to provide an additional layer of protection. The garage door sensors since it helps to prevent accidents and mishaps.
This is also confirmed by The US Consumer Product Safety Division. The body has published official guidelines about garage door sensors.
Enhance Security
One of the common ways you can leave your home vulnerable is by leaving the garage door open. This can happen if something is on the way to the door, causing it to not close properly. A garage door sensor can prevent this, enhancing your garage security.
With a garage door sensor, you receive immediate feedback that the door cannot close due to an obstruction. This means you can go back, remove the offending object, and ensure the door closes shut.
With this, you can ensure your garage door closes tight every single time. This removes the risk of break-ins through a partially opened garage door.
How Do Garage Door Sensors Work?
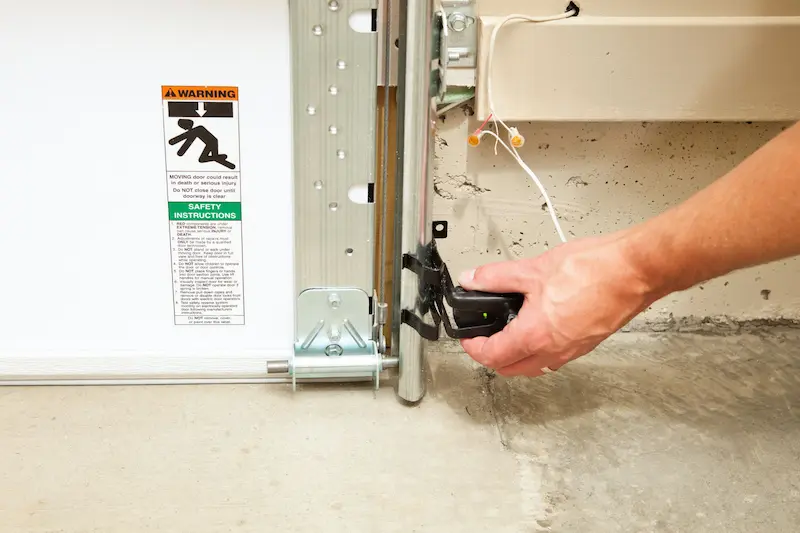
Garage door sensors work by having a receiver and a beamer sensor. Both sensors are installed on each side of the door, close to the ground. When an obstruction appears, it causes the sensors to not communicate. This causes the garage door to stop operating.
As much as garage door sensors look high-tech and fancy, they work on a simple concept. They use infrared (IR) beam transmission technology.
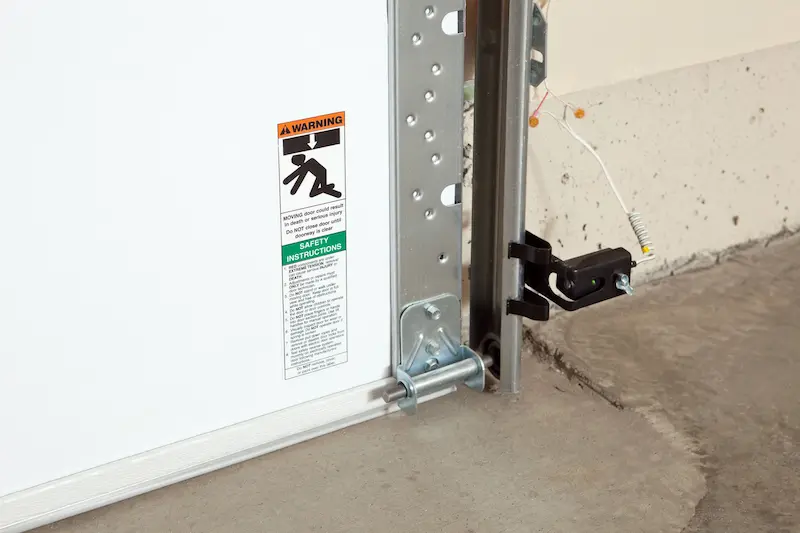
Garage door sensors consist of several parts. Two sensors and wiring. The wiring connects the sensors to the garage door opener motor.
One of the two sensors is the beamer sensor, and the other is the receiver sensor. These sensors are usually mounted on both sides of the garage door rail, close to the ground. You then align them to ensure they are straight.
When you close the door, the beamer sensor beams out infrared signals. If there is nothing in the door’s pathway, the receiver sensor receives the signal.
However, they will block the signal if something is in the door’s pathway. The receiver sensor will not receive any signal from the beaming sensor. In this case, the receiving sensor sends a signal to the garage opener door, halting its operation.
Your sensor types will respond differently once you remove the obstruction. Some will automatically resume closing the door. Some will require you to press ‘close’ on the controller again to continue operating.
How Can I Confirm If My Garage Door Sensors Are Working?
You can confirm if your garage door sensors are working by testing them. Locate the position of your garage door sensor, and close the garage door. Place an object directly under the garage door’s pathway as the door closes. If your sensors are working, your garage door will stop operating.
Garage door sensors use simple infrared technology, but it does not mean they cannot break down. You should regularly test the system to ensure it works.
To test if your garage door sensors are working, follow the steps below:
- Start by locating your garage door sensors. They are usually mounted on both sides of the garage door, about 2-6 inches off the ground.
- Prepare an object; we recommend something large and light, like a cardboard box.
- Close the garage door.
- As your garage door closes, place the cardboard box. Place it right underneath the garage door’s pathway.
- If your garage door sensor works, it will immediately detect the obstruction. Your garage door will stop operating.
Why Are My Garage Door Sensors Not Working?
Your garage door sensors may not work due to several reasons:
- Dirty Lenses
- Damaged Wire
- Misalignment
- Obstruction
Suppose you tested your garage door sensors and discovered they do not work as they should. Before you panic or call a professional, here are some reasons it may not work. Some have such simple fixes you’ll be surprised.
Obstruction
Have you placed something along the pathway of the garage door and forgotten about it? This may be the reason your garage door sensors are not working well.
Spend some time and look along the pathway of the sensors to confirm. Also, check the railings, too, just in case the sensor caught some grease or dirt. This may cause the sensors to assume an obstruction and stop your garage door.
Extreme Light
At times, very bright sunlight can reflect on the panels of the sensors. This may cause the sensors to fail to communicate. This could happen, especially during hot summer days. If you have installed new lighting in your garage, the lights could also bounce on the sensors.
In this case, test out if external lighting is the issue first. Turn off all lights, or test the garage door opener at night. If the door works just fine, turn on all the lights in your garage and try again.
If your garage door works now, then sunlight may be the issue. If it doesn’t, then it’s the issue with the lighting. See if you can remove the lighting away. You can also place some kind of barrier to block sunlight from reaching the sensors.
Dirty Lenses
Suppose you live in a dusty region or perform a lot of woodworking in your garage. In this case, you may be exposing your garage to a lot of dust. Some may end up on the lenses of your sensors, causing them to fail to communicate.
In this case, a simple wipe-down is all you need to do. Get a piece of cloth, and wipe the lenses clean. You can even use a broom or just your fingers to clean them. Retest the sensors to ensure it is fixed.
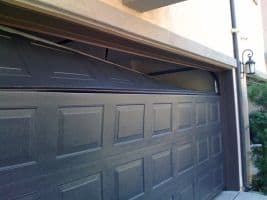
Misalignment
If you have cleaned the sensors, the garage door still does not operate well. Your next step is to check for misalignment. The sensors need to be in a straight line with each other. This ensures that the receiver sensor can catch the IR beam from the beaming sensor.
In some cases, the sensors may become misaligned from impact. At times, they may misalign from plain unexplainable reasons. Adjust the sensors by wriggling them until it stops showing blinking lights.
This means the sensors are now aligned. Once you confirm they are straight, retest the system to see if it works.
Damaged Wire
Suppose the garage door opener still does not work despite all the steps above. This could be a more extensive issue, such as the wiring. Spend some time tracing the wiring from the sensors to the garage motor.
Inspect for signs of wear. If you are unlucky enough to have pests, they may have chewed on the wires, too, causing the wires to not work.
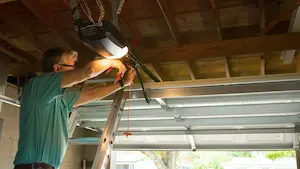
If all the above inspection steps do not work, you may need a garage door professional to check for you. In this case, these professionals should be able to better advise you on how to fix the issue.
How To Adjust Garage Door Sensors?
You can start by removing the sensors from their brackets to adjust the garage door sensors. Point away to reset it. Put the sensor back, but keep the nuts loose. Wriggle and adjust until the lights are solid and not blinking. Tighten the nuts to secure the sensor.
You may think adjusting the garage door sensor may be difficult to do and may need specialized tools. The nice thing here is that you don’t need any. The sensors have their own way of aligning; you only need to know the work process to align the sensors.
To adjust and realign your garage door sensors, follow the steps below:
- Clean both sensors first to ensure they can communicate effectively.
- Open the wing nuts, and remove the receiving sensor from the bracket.
- Point the sensor away to reset it. Wait for about 10 seconds, and you should see the lights blinking. This indicates the sensors are not aligned.
- Put the sensor back, then put in the wing nuts, but keep them loose.
- Wriggle and adjust the sensor until you see the blinking lights turn solid. This indicates that the sensors are now aligned.
- Tighten the wing nut to secure the receiving sensor, and retest the system to confirm.
How Much Do You Need to Repair Garage Door Sensors?
Depending on the issue, expect to fork out between $75 to $180 to repair your garage door sensor issue. Fixing malfunctioning sensors should cost you around $75 – $85. Replacing the sensors and installing them professionally would cost up to $180.
Suppose all testing fails, and you decide to call in a professional to help. In this case, knowing the cost to avoid sticker shock may be good.
Generally, if you only need repairing work on the sensors, it will cost around $75 – $85. This is because no major hardware is required; just pay for the technician’s time and minor parts such as wiring.
If you need to replace your sensors and have a technician replace them, expect to shell out up to $180. You pay more but do not need to do anything; just let the technician do it for you.
If you intend to save some cash, you can buy a fresh set of garage door sensors and install them yourself. In this case, a new set of sensors should set you back by $85 – $100.
Can I Bypass Garage Door Sensors?
You can bypass garage door sensors in case of emergencies. Disconnect the door from the opener motor by pulling the emergency release cord. You can then open and close the garage door manually. You can reconnect the system back after you have fixed the sensors.
Suppose your garage door openers are broken, and you need to use the garage door now. The technician still needs some time before they can come over.
In this case, you can bypass the sensors and manually operate the garage door. You can reconnect them once the sensors have been fixed.
To bypass your garage door sensors:
- It’s safest to disengage the sensors when the door is closed. Your garage door springs might not work correctly. Your garage door could also come falling down dangerously.
- If the door is stuck open and won’t close, pry it open with something sturdy that can handle the door’s weight.
- Pull the red emergency release cord. Now you can retract and pull the garage door by hand.
- If the door was stuck open. Ask a buddy to help remove your placed objects, keeping the door from falling. Another person can hold the door in position. Keep in mind some garage doors weigh very much! If the springs are not working.
- Get the sensors replaced or fixed.
- Connect the emergency release back to the motor unit
FAQ
What Color Should the Lights Be on Garage Door Sensors?
Garage door sensors come in many light colors, depending on the makers. We were able to get collect some information from popular manufacturers. However, we advise that you still check with your sensor makers.
It could also be possible that some models may have different colors, even if they are from the same maker. Check prices for replacement garage door sensors.
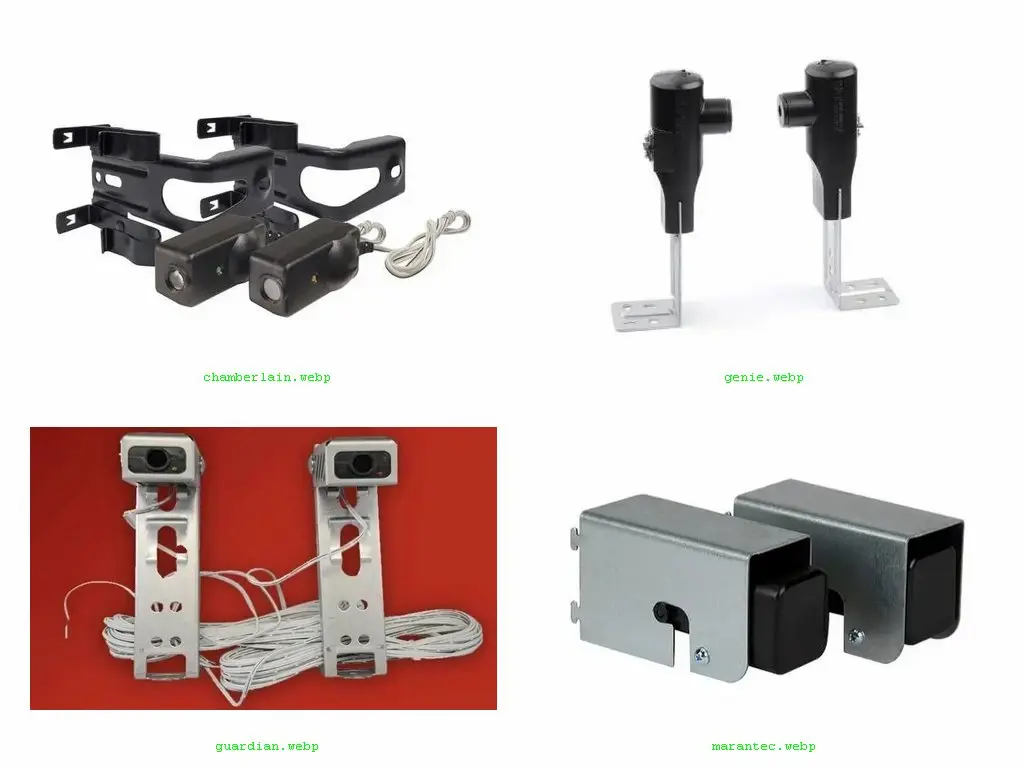
| Manufacturer | Transmitting Sensor | Receiving Sensor |
| Guardian | Green | Red |
| Marantec | Green | Red |
| Genie/Overhead | Red | Red |
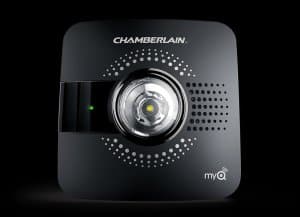
| Chamberlain/Liftmaster/Craftsman | Amber / Yellow | Green |
How Long Do Garage Door Sensors Last?
Garage door sensors typically last for about 10 years. On top of that, many manufacturers offer great warranties too. However, actual operation time may depend on many factors. These include door use and weather conditions.
The more times you open and close your garage door, you may wear out the sensor faster. Suppose you live in locations with more extreme temperature fluctuations. In this case, extreme heat or cold may wear down your door sensors faster.
How Many Volts Should A Garage Door Sensor Be?
Most garage door sensors operate on a small voltage, usually 5 volts. The current is usually a direct current (DC).
Ensure you are supplying the right power source before installing. This prevents you from damaging your garage door sensors.
Can Garage Door Sensors Get Wet?
Garage door sensors can get wet. Most decent garage door sensors come with rubber gaskets or seals. These gaskets and seals prevent water from breaking into the sensor unit itself.
However, this does not mean the sensor can be submerged in water. In most cases, these sensors are fine dealing with splashes or sprinkles of water only. If you want even better protection, consider applying some silicone seals.
Are Garage Door Sensors Universal?
Garage door sensors are usually universal, although there may be exceptions. Generally, you can treat garage door sensors similarly to remote control.
This means you can find universal sensors. Some devices only work with specific controllers.
Before you buy any universal sensors, check and see if they work with your garage door opener system. The packaging should have the information. You can also check with the sensor maker directly as well.
Can You Run a Garage Door Opener Without the Sensors?
You can run a garage door opener without the sensors. However, you may be taking a risk here. There are injuries, damage, and potential legal issues as well.
Suppose you left something on the pathway of the garage door. In this case, without the sensor, the garage door may bear its full weight on the item, damaging it. This could likely be your car since it is usually the largest item in the garage.
Suppose you have children, pets, or older adults with mobility issues. In this case, you risk injuring them if your garage door does not have sensors. This is because they cannot stop and will continue to bear its weight on them.
Finally, many localities actually require garage door openers to come with sensors. This is to enhance safety. If you operate your garage door without them, you may have some legal liability here.
Can You Add Safety Sensors to an Old Garage Door?
If your garage door opener is old or over 15 years old, sensors will likely not work with them. This is because the system is old and may run on a mechanized system. This means it does not have circuitry to communicate with the sensors.
In this case, consider replacing your garage door opener system. Your garage door openers are really old, and it may make sense to just replace them instead before they break down.
Are There Batteries in Garage Door Sensors?
Garage door sensors usually do not have batteries. This is because they have wires that bring power supplies to the sensor units.
However, with very modern systems, you may see battery-powered garage door sensors. These typically use dry-cell batteries to operate. This means you will need to occasionally replace the dry cells when they run out of power.