How To Change Garage Door Torsion Springs
This post contains affiliate links.
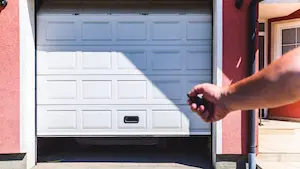
Garage door springs help to make opening the garage doors easier. However, sturdy they are, they age, and you may one day break them. You can call a professional to get the job done, but what if you want to DIY yourself?
If you are looking for the definitive how-to guide to changing your garage door torsion springs, then you are at the right place.
To change garage door torsion springs:
- Close the garage door fully and secure the door
- Unwind the torsion spring
- Unbolt the pulley and detach the door cables
- Remove the main bar from the wall bracket
- Slide pulley and old spring out
- Slide new spring and pulley in
- Reinsert the main bar into the wall bracket
- Reattach door cables and bolt back pulley
- Wind the torsion springs
- Lubricate and test the spring
This article details the process of how you can replace your own garage door torsion springs. We also look into how these garage doors work and how to select the correct springs. Finally, we discuss some safety precautions you can take while performing the job.
We also have detailed guide how you can change your garage door extension springs. In case your garage door uses extension springs, check out our guide here instead.
There is also general article about garage door springs here.
How Do Garage Door Torsion Springs Work?
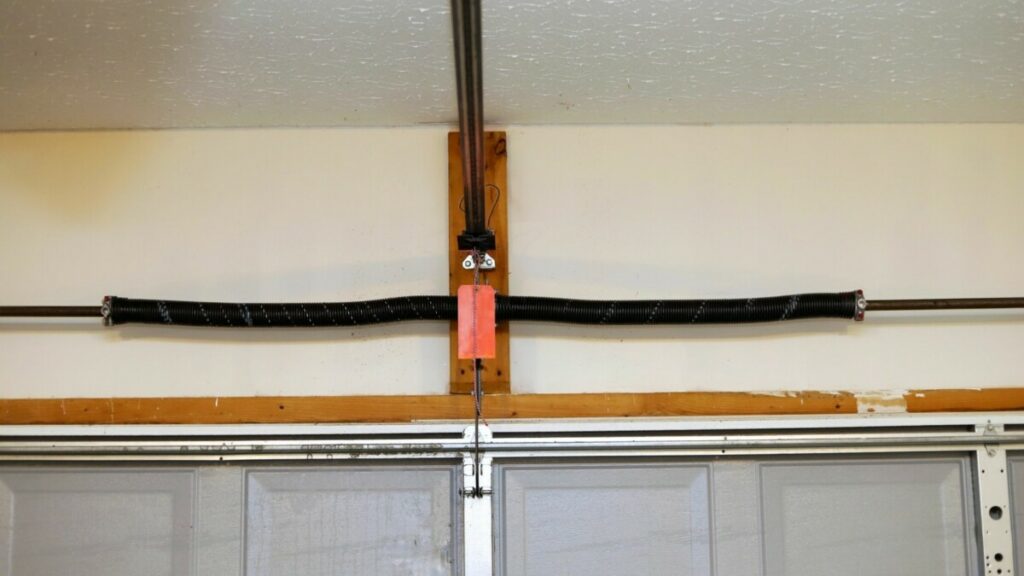
Generally, garage door torsion springs work using a torsion spring, main bar, pulleys, and cables. When you open the door, the torsion spring will unwind, using the energy to lighten the door. When the door is closed, the cables will rotate the main bar, which will wind the torsion springs.
A generic garage door torsion spring system contains two torsion springs, the main bar, two pulleys, two wall brackets, and two cables. There may be other torsion spring systems, but they are usually variations of the basic system, which we will describe here.
The main bar stretches the width of the garage door and then some. It is mainly held in its place by two wall brackets installed, usually at the top corner and outside of the garage door. Every other component attaches to the main bar somehow or other.
There are pulleys beside the wall brackets secured to the main bar. The pulley is disc-shaped and holds onto a cable. The other end of the cable attaches to the garage door.
Right in the middle of the main bar is the torsion spring. It is also bolted to the main bar, rotates, and winds up when the main bar is turned.
The cable is pulled from the pulley when you close the garage door. As the pulley is bolted to the main bar, the pulley’s rotation also rotates the main bar. The main bar’s rotation, in turn, turns and torsion spring, winding it up. As the door remains closed, the kinetic energy remains in the spring.
The cable is rewound into the pulley when you reopen the door. The pulley rotates, making the torsion spring release energy, turning the whole main bar and pulley assembly.
This means the spring helps handle some of the door’s weight, meaning you do not have to lift the door up with your muscles. Once the door is fully opened, the torsion springs become loose and fully unwound.
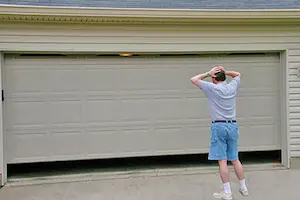
How To Tell If Your Torsion Springs Need Replacement?
The telltale sign that your garage door torsion springs need replacement is when it has become increasingly heavier to open your garage door. If you notice that the spring has rust marks or has broken in two, you should replace it too.
If you look at garage door torsion springs, they are some tough things. They are thick and robust and work quietly to help you lift your garage door. These springs are so good they could last decades with proper care.
However, as tough as they are, they still break down, usually over years of winding and unwinding. This means there will come a time when you have to replace it.
To quickly tell if you need to replace your garage door torsion springs, observe for several of these signs:
Heavier Garage Doors
If you notice that your garage door is becoming heavier and heavier to lift, you want to look at the garage door. If your garage door is motor-powered, you may notice your garage door opener is struggling to lift the door.
You will notice additional effort to lift your garage door if the springs fail. This is because garage doors are usually heavy. They may weigh as much as 100 or more pounds.
You can assume the same for your motor. As the spring fails, the motor has to bear more and more of the door’s weight. It may either work slower or fail to even turn. Worse, you may burn your motor too.
Rust On Torsion Springs
If you notice rust marks on your torsion springs, you want to replace them immediately. This is because rust breaks down the integrity of the springs, making them more fragile and more likely to malfunction.
When torsion springs break down, they may snap violently, meaning you may hear a loud explosion, similar to a gunshot. This may be scary and traumatic to some people, especially children. Which means you want to replace the spring before it snaps.
Deformed Spring
As springs lose their elasticity, they may start to deform. Some parts of the spring may look distorted, even when the spring is not wounded. Older springs may have bend marks.
Generally, as springs deform, they may cause the door to feel heavier to lift. When this happens, you want to replace the spring, as you cannot repair or recondition the springs.
Broken Torsion Springs
If you further ignore the issue, it may come a day when the spring finally breaks. When it breaks, it usually breaks violently, snapping in two and then releasing some kinetic energy. The snapping sound may sound like a gunshot.
Fortunately, the torsion springs are held in the center by the main bar, which means the spring will remain at their position and not fly around. This avoids injury or the flying spring pieces breaking anything in your garage.
However, the spring no longer works, meaning you will bear the garage door’s entire weight when opening it. Replacing the torsion spring is the only logical option here.
How To Select the Right Garage Door Torsion Springs?
To select the correct torsion springs, simply observe the stripe color of the spring body and the color on the spring’s outer ends. The spring body color indicates the size and load, while the outer side body tells if the torsion spring is right winding or left winding. Simply purchase springs with similar colors to get a suitable replacement.
Shopping for a replacement torsion spring is a little bit more complicated than an extension spring, but it is not rocket science.
With extension springs, you only observe the color to determine the weight rating. But with torsion springs, you have two colors to observe.
The first color was painted on the outdoor ends of the spring. You will only see two colors here, red or black. The colors here indicate the winding direction of the spring. Red means it winds right, and black means it winds left.
| Color | Winding Direction |
| Red | Right |
| Black | Left |
Getting the winding direction is essential. If you installed the wrong one, the spring will not wind properly and may be deformed and even break once you apply the door’s total weight.
Once you have figured out the outer end color, now look at the spring itself. You should see colors painted on the spring in stripes. The color tells the spring wire size or gauge. There are 11 colors, ranging from light blue to white:
| Color | Wire Size (in inches) |
| Light Blue | .125/.200/.283/.375/.490 |
| Yellow | .135/.207/.289/.393/.500 |
| Red | .142/.225/.421/.562 |
| Brown | .148/.234/.306/.430/.625 |
| Tan | .156/.312/.437 |
| Green | .162/.243/.319/.453 |
| Gold | .177/.250/.331/.461 |
| Purple | .182/.257/.594 |
| Blue | .187/.262/.343/.468 |
| Orange | .120/.192/.273/.362 |
| White | .218/.295/.406/.531 |
You may see overlapping wire thickness ratings because each color may represent a different wire gauge. Therefore, you may see each spring color representing multiple wire diameters.
For example, a gold-colored spring may come in four wire sizes. The thinnest wire may measure .177 inches, thicker ones measure .250 inches, .331 inches, and the thickest is at .461 inches.
Thicker springs should handle heavier doors better. When in doubt, always place the old spring side by side with the new one to ensure they are similar to each other before purchasing it.
How To Change Garage Door Torsion Springs?
To change your garage door torsion springs, start by preparing the tools. You then secure the door before unbolting parts to remove the old spring. You then install the new spring before you bolt back all the parts. Then you lubricate the spring before testing if the new spring works.
Fortunately, changing garage door torsion springs is not rocket science. You need simple tools and basic safety equipment to replace the springs.
Step 1: Prepare The Tools
You only need basic tools and safety equipment to do the job. Most of the tools should be lying about in your house. To start, prepare the following to ensure a smooth replacement job: (links to Amazon)
- 2 garage door Torsion springs
- A socket wrench set
- A crescent wrench set
- 2 C-clamps
- A ladder / stool
- WD40 general lubricant or garage spring lubricant
- Locking plier
- Work gloves
- Eye protection glasses
- Spring winding/unwinding bar
Step 2: Secure The Door
Before proceeding with the replacement job, you need to ensure two things. First, ensure the door has been entirely closed. This helps to wind the spring up.
This may sound counterintuitive, but logically speaking, the spring should be unwounded. However, since the spring is right at the top center of the door, replacing it with the spring unwound may not be possible.
Once completely closed the door, you want to prevent the door from accidentally sliding up. This may be dangerous since if the door slides up accidentally, it may hit and injure you.
To secure the garage door:
- Put on your safety gear.
- Close the door entirely.
- If your garage door is connected to an electric motor, unplug it. This ensures the motor does not accidentally engage.
- Locate the tracks of the garage door. You should see a track where the garage door slides up or down.
- With a C-clamp, clamp tight on both sides of the rail.
- This helps to stop the garage door from opening in full if accidentally engaged.
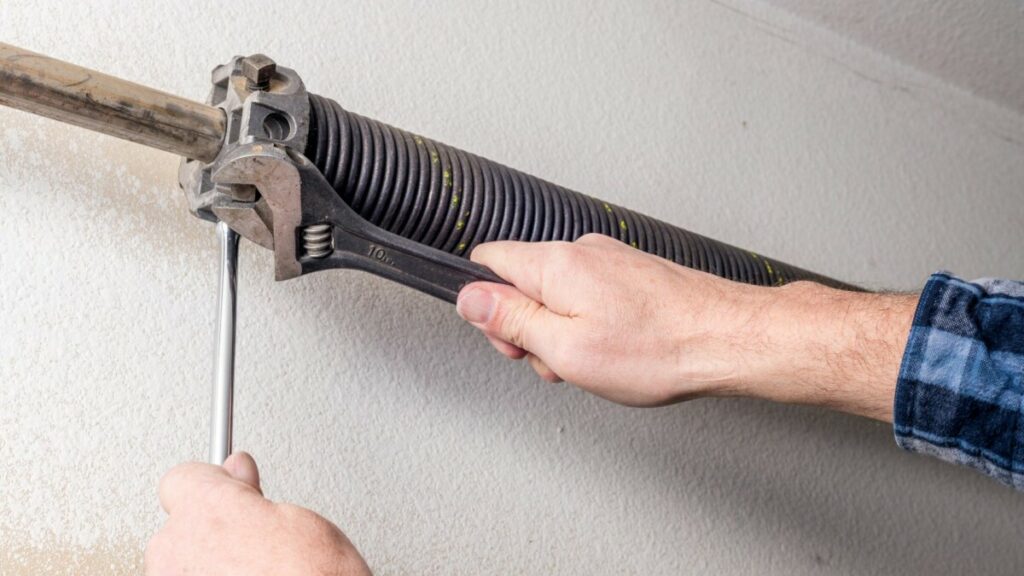
Step 3: Remove The Old Spring
Now you will start to remove the old spring from the main bar. This will require you to use a ladder to reach the springs and bar, but do it step by step, and you should be ok.
Let’s start by unwinding the old springs.
- Slot in your winding bar to the holes at the edges of the torsion spring. Use one hand to hold it. This will help you to control the spring’s unwinding.
- On the other hand, use a socket wrench to loosen the springs held on the main bar. At this point, you should feel more tension on the winding bar.
- Slowly move the winding bar down to rest on the door. Use another winding bar, and attach it to the other hole.
- Use one of your hands to hold on to the new winding bar and remove the previous one resting on the door.
- Move the other winding bar down until it rests on the door again.
- Repeat steps 3 – 5 until the spring has been fully wounded. As you unwind, calculate how many times you turn the spring, as you will rewind the new spring with the same number of turns.
- Repeat steps 1-6 on the other torsion spring.
At this stage, both your springs should be fully unwound and hang freely with the main bar inside them. You can now proceed to unbolt and remove parts from the main bar.
- Start by unbolting the bolts between the torsion springs.
- Go to the pulley at the end of the main bar. Unroll and detach the cable from the pulley.
- As you disconnect the cable, please note how the cable ends attach to the pulley so you can reattach it confidently later.
- With a socket wrench, unbold and loosen the pulleys’ grip on the main bar.
- Slide the pulley slightly inside, away from the wall bracket.
- Repeat the same steps 1-5 on the other side of the main bar.
When you finish this step, the pulley and springs should be fully hanging free, with the main bar in the middle of them. Now you can remove the pulley and old spring from the main bar.
- Slide the main bar away from the wall bracket until it detaches.
- Pull the pulley out from the main bar.
- Pull the old torsion spring out from the main bar.
- As you pull out the spring. Observe the color, and ensure which side the spring winds.
- Repeat steps 1-4 on the other side of the main bar.
Step 4: Install The New Spring
With the old spring removed, you can now install the new spring.
- Start by placing the old spring side by side with the new spring, and compare the color and thickness of the spring wires. They should be identical. If not, get identical springs instead.
- Start by sliding the new torsion spring into the main bar.
- Ensure you slide in the torsion spring that winds in the right direction.
- Slide in the pulley.
- Repeat steps 1-4 on the other side of the main bar.
- Reinsert the ends of both main bars into the wall bracket hole.
With everything replaced back, we will now bolt the parts back.
- Start by bolting both springs together. Use a socket wrench to do this.
- Slide the pulley back to its original position.
- Attach the cable back to the pulley, attaching it the way you removed it.
- Turn the pulley and roll in the cable until it is slightly tight. Ensure the cable is not blocked by anything.
- Bolt the pulley back to the main bar using the socket wrench.
- Clip your clip plier to the main bar, and rest the other end of the plier against the wall or ceiling. This prevents the main bar from spinning, causing the cable on the other end of the main bar to not move in sync with
- Repeat steps 2-5 on the other pulley.
The main bar, pulley, and cables are nicely assembled at this stage. You now only need to wind the springs and then tighten them to the main bar.
- Slot in your winding bar to the holes at the edges of the torsion spring. Push the bar in the other direction to wind it.
- Once you push the bar up, take the other winding bar, and slot it into the other hole.
- Remove the previous winding bar, and then push the newly inserted bar up.
- Repeat the process until the spring has been wounded. You should repeat the winding process at a similar time as during your unwinding. If it takes 30 repetitions to fully unwind the spring, you should wind the spring 30 times.
- Once wounded, secure the spring by bolting it to the main bar.
- Repeat steps 1-5 on the other spring.
Step 5: Lubricate And Test
Your new springs should now be nicely installed, and everything should be bolted back in place. You are now at the last stage to lubricate and test the spring.
- Take some WD-40 or garage spring lubricant, and spray generously on the springs. This creates an additional seal that slows down rusting of the spring.
- Remove the C-clamps on the door rail.
- Try to open the door. If all goes well, it should open easily, with similar effort before the old springs were still good.
- If your garage door uses a motor, connect it to power and turn it on. It should also open up the door easily.
- Done! Give yourself a solid high five and make a cup of coffee to celebrate.
How Much Does It Cost to Repair or Replace the Garage Door Springs?
If you want the job done by professionals or DIY, Here is up-to-date info at Homeadvisor.com and Homeguide.com
https://homeguide.com/costs/garage-door-spring-replacement-cost
https://www.homeadvisor.com/cost/garages/garage-door-spring-repair/